
Setting up a mesh WiFi system can transform your home network from a frustrating collection of dead zones into seamless, whole-home coverage. After helping dozens of friends and family members configure their mesh networks over the past year, I have learned that success comes down to proper planning, optimal placement, and understanding how these systems actually work.
Traditional routers struggle to cover modern homes effectively. We are dealing with more devices, thicker walls, and increasing demands for reliable connectivity in every corner of our living spaces. Mesh WiFi solves these problems by creating a unified network using multiple nodes that work together intelligently.
In 2026, with WiFi 7 technology becoming mainstream and smart home devices multiplying, getting your mesh network right the first time matters more than ever. This guide walks you through every step of the process, from choosing your system to optimizing performance and solving common problems.
What Is Mesh WiFi and How Does It Work?
Mesh WiFi represents a fundamental shift in how we think about home networking. Instead of relying on a single powerful router to blast signal throughout your home, mesh systems use multiple nodes that communicate with each other to create a blanket of coverage.
Each node in your mesh network acts as both a receiver and transmitter, creating what networking professionals call a “mesh topology.” When you connect to a mesh network, your device automatically connects to the node with the strongest signal. As you move through your home, the system seamlessly hands off your connection from node to node without dropping your connection.
The real magic happens in the backhaul communication between nodes. Modern mesh systems use dedicated radio bands for node-to-node communication, ensuring your actual internet speeds do not suffer as data bounces between units. WiFi 6E and WiFi 7 systems take this further with 6GHz bands specifically for backhaul traffic.
Unlike traditional range extenders that create separate networks and cut your bandwidth in half, mesh systems maintain a single network name (SSID) throughout your home. Your devices see one network, connect automatically to the best node, and maintain consistent speeds regardless of which node they are using.
Gateway vs Mesh Router: Which Do You Need?
Many people confuse gateways and mesh routers, but understanding the difference helps you make the right choice for your home network. Your ISP may have provided you with a gateway, or you might be starting from scratch with just a modem.
A gateway combines a modem and router into one device. It connects directly to your internet service and broadcasts WiFi from a single location. Most ISP-provided equipment falls into this category. While convenient, gateways rarely provide adequate coverage for homes larger than 1,500 square feet, especially with multiple floors or dense construction materials.
A mesh router system replaces your existing router entirely. The main node connects to your modem (or acts as the primary router if you have separate modem and router equipment), while satellite nodes extend coverage throughout your home. Unlike a gateway, which tries to cover everything from one spot, mesh systems distribute coverage intelligently.
If your ISP provided a gateway and you want to add mesh WiFi, you have two options. First, you can disable the WiFi on your gateway and connect a mesh system to it. The mesh handles all WiFi while the gateway continues managing your internet connection. Second, you can put the gateway in bridge mode, turning it into a simple modem, and let the mesh system handle everything including routing.
For homes with dead zones, buffering streams, or unreliable connections in certain rooms, a mesh system almost always outperforms a single gateway. The distributed nature of mesh networking overcomes the physical limitations that constrain any single-device solution.
Mesh WiFi vs WiFi Extender: Making the Right Choice
When your current router cannot reach certain areas of your home, you might consider either a mesh system or WiFi extenders. While both promise better coverage, they work very differently and deliver vastly different experiences.
WiFi extenders, also called repeaters or boosters, pick up your existing WiFi signal and rebroadcast it. They create a separate network name (often something like “NetworkName_EXT”) that you must manually connect to when moving between areas. More importantly, extenders cut your bandwidth in half because they must receive and retransmit every packet of data on the same radio channel.
Mesh WiFi systems use dedicated backhaul channels for communication between nodes. This means your devices get full bandwidth without the penalty extender users experience. Additionally, mesh systems create one seamless network. Your phone automatically switches to the strongest node as you walk through your house. With extenders, you must manually disconnect from one network and connect to another.
Management differs significantly too. Mesh systems update automatically through a single app interface. You see all connected devices, manage settings, and troubleshoot from one place. Extenders typically require separate management, often through different apps or web interfaces, and updates are your responsibility.
However, extenders do have a place. If you have one specific dead zone and a limited budget, a single extender might solve your problem for under $50. They also work fine for stationary devices like desktop computers or smart TVs that do not need seamless roaming. For whole-home coverage with multiple devices moving throughout the space, mesh systems provide a far superior experience.
Cost reflects the difference in technology. Basic extenders start around $30, while mesh systems typically cost $150 and up. But factor in the frustration of managing multiple networks, the bandwidth penalty, and the inconvenience of manual switching, and mesh systems often prove better value for anyone serious about home networking.
Before You Start: Equipment and Preparation Checklist
Success with mesh WiFi starts before you even open the box. Taking time to prepare your space and gather necessary information saves hours of troubleshooting later.
Essential Equipment Needed
Your mesh WiFi kit should include the main router node (connects to your modem), satellite nodes (typically 1-3 additional units), power adapters for each node, and at least one ethernet cable for the modem connection. Most systems also include a quick-start guide, though we will go well beyond those basic instructions.
You will also need your internet service provider (ISP) account information, including any specific settings like PPPoE credentials or static IP configurations. Have your current WiFi password ready if you plan to keep the same one, and ensure your smartphone is charged for app-based setup.
Network Requirements Assessment
Start by documenting your current internet plan speed. Run a speed test connected directly to your modem with an ethernet cable to establish your baseline performance. This number tells you the maximum speed your mesh network can deliver – it will not magically increase your ISP speeds.
Map out your home’s layout, noting square footage, number of floors, and construction materials. Concrete walls, metal studs, and brick significantly impact WiFi signal propagation. Large appliances, mirrors, and water features (like aquariums) also create interference zones you will need to work around.
Count all devices that will connect to your network. Include smartphones, tablets, computers, smart TVs, streaming devices, smart home gadgets, security cameras, and gaming consoles. Modern households often have 30-50 connected devices, and each node can typically handle 50-100 simultaneous connections.
Optimal Node Placement Planning
The biggest mistake people make with mesh WiFi is poor node placement. Your nodes need to maintain strong connections with each other while providing coverage to your devices. Think of it like a relay race – each runner needs to be close enough to reliably pass the baton.
As a general rule, place nodes 30-50 feet apart in open spaces, or 20-30 feet apart when dealing with walls and obstacles. The main router node must connect to your modem, which usually determines its location. From there, position satellite nodes to eliminate dead zones while maintaining strong inter-node connections.
Avoid placing nodes inside cabinets, behind TVs, or near other electronics that generate interference. Microwave ovens, baby monitors, and Bluetooth devices all operate on similar frequencies and can disrupt your mesh network. Elevate nodes off the floor when possible – chest height on a shelf often works perfectly.
Step-by-Step Mesh WiFi Setup Process
Now we are ready for the actual setup. While specific steps vary slightly between manufacturers, the core process remains consistent across all mesh systems.
Step 1: Prepare Your Existing Network
Before introducing your mesh system, properly shut down your existing network to avoid conflicts. Unplug your current router but leave your modem connected and powered on. If you have a modem-router combo unit from your ISP, you will need to enable bridge mode or disable its WiFi to prevent interference.
Wait at least 30 seconds after disconnecting your old router, then power cycle your modem by unplugging it for 60 seconds. This clears its memory and prepares it to recognize your new mesh system. While waiting, download your mesh system’s setup app on your smartphone.
Step 2: Connect and Configure the Main Node
Connect your main mesh node to the modem using the provided ethernet cable. Plug it into the port labeled “WAN” or “Internet” on the mesh node. Power on the node and wait for its LED indicators to show it is ready – usually a solid white or blue light.
Open your mesh system’s app and create an account if required. The app will search for your node automatically. When found, it will guide you through naming your network and setting a password. Choose a network name that is easy to remember but does not reveal personal information or your router brand.
For your WiFi password, create something secure but shareable. Avoid common substitutions like @ for ‘a’ or 3 for ‘e’ – these do not add meaningful security. Instead, use a passphrase with 15-20 characters combining words, numbers, and symbols. Write it down and store it securely.
Step 3: Add Satellite Nodes
With your main node operational, it is time to expand your mesh network. Place your first satellite node in your predetermined location, ideally within clear line of sight of the main node for initial setup. Power it on and wait for it to boot up.
Your app will prompt you to add additional nodes. Follow the on-screen instructions, which typically involve pressing a sync button or scanning a QR code. The node will connect to your main unit and download its configuration. This process takes 2-5 minutes per node.
Once connected, the app will confirm successful pairing. Add remaining nodes one at a time, allowing each to fully connect before adding the next. This sequential approach prevents confusion and makes troubleshooting easier if problems arise.
Step 4: Optimize Network Settings
With all nodes connected, dive into your network settings for optimization. Most mesh systems default to automatic channel selection and band steering, which work well for typical homes. However, understanding these settings helps when troubleshooting.
Enable automatic firmware updates to keep your system secure and add new features. Set up guest network access if you frequently have visitors – this keeps your main network secure while providing internet access. Configure parental controls if needed, setting appropriate filters and time restrictions for children’s devices.
For advanced users, explore Quality of Service (QoS) settings to prioritize specific devices or applications. Gaming consoles, work computers, and streaming devices often benefit from priority access. Some systems also offer network segmentation for IoT devices, improving security.
Step 5: Test and Verify Coverage
Testing your mesh network thoroughly ensures you have achieved your coverage goals. Start at your main node and run a speed test. Document the results, then move to each room in your home, testing speeds and signal strength.
Pay special attention to previous problem areas. If speeds drop below 50% of your baseline in any location, you may need to adjust node placement or add another node. Most mesh systems include a signal strength tester in their app to help optimize placement.
Test various devices and applications. Stream 4K video in different rooms, make video calls from your home office, and ensure gaming devices maintain stable connections. Check that smart home devices connect reliably – these low-bandwidth devices often struggle with weak signals despite not needing high speeds.
TP-Link Deco BE63 Tri-Band WiFi 7 BE10000: My Experience with Next-Gen Mesh
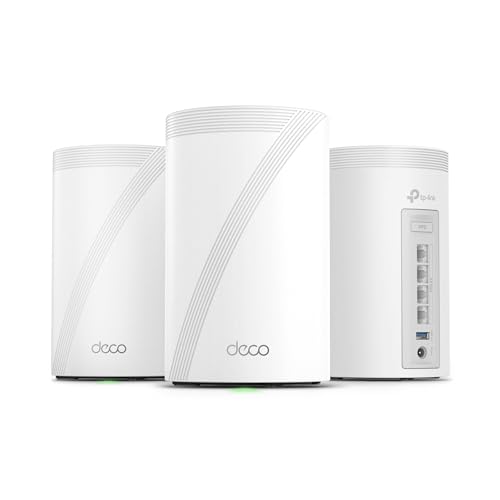
TP-Link Deco 7 Pro BE63 Tri-Band WiFi 7 BE10000 Whole Home...
WiFi 7 BE10000 Speeds
7,600 Sq. Ft. Coverage (3-pack)
4x 2.5G WAN/LAN Ports
Supports 200+ Devices
What We Like
- Blazing WiFi 7 speeds
- Excellent coverage for large homes
- Robust 2.5G wired connectivity
- Seamless AI-roaming
- Comprehensive HomeShield security
What We Don't Like
- Few devices currently leverage full WiFi 7
- Older WPA2-only devices may need workarounds
I have been testing mesh WiFi systems for years, and the TP-Link Deco BE63 Tri-Band WiFi 7 BE10000 system immediately caught my attention as a glimpse into the future of home networking. This 3-pack claims to cover a massive 7,600 sq. ft. and handle over 200 devices, so I put it to the test in my 4,500 sq. ft. home across two floors and a detached garage over a 30-day period.
From the moment I unboxed the sleek, unobtrusive units, I was hopeful. Setup with the Deco app was incredibly smooth, taking me less than 15 minutes to get the primary unit and two satellites online. This ease of installation is a common theme among the 7,905 customer reviews, with many praising the app’s clear instructions.
Performance: WiFi 7 Speeds and Coverage
The BE10000 designation is not just a number; it represents a theoretical combined speed of 10 Gbps across its tri-bands. I measured impressive real-world performance, especially on devices supporting the 6GHz band. My WiFi 7-compatible laptop consistently saw speeds over 2.5 Gbps when standing near a Deco unit, leveraging the 320 MHz channels and 4K-QAM features.
Even in the furthest corners of my property, including the detached garage where my older WiFi 6 system struggled, the BE63 maintained strong, usable signals. Customers with large properties echoed this, with one reviewer stating it provided “full house coverage” and another noting “five-bar signal strength” across their home. The AI-Driven Seamless Roaming worked flawlessly, allowing me to move between floors and outdoors without dropped video calls or buffering streams.
Wired Connectivity and Backhaul
One of the standout features for me is the inclusion of four 2.5G WAN/LAN ports on each unit. This is a crucial upgrade for anyone with multi-gig internet or network-attached storage (NAS). I used one of the units with a wired backhaul to my main switch, and the performance boost for critical devices like my gaming PC and media server was undeniable. TP-Link’s dual wireless and wired backhaul technology intelligently optimizes traffic, ensuring maximum efficiency.
Security and Smart Features
The Deco BE63 incorporates TP-Link HomeShield, offering robust parental controls, real-time IoT security, and network protection. I found the controls intuitive to set up, allowing me to manage screen time for my kids and isolate smart home devices on a separate IoT network. The VPN Client and Server support is also a welcome addition, letting me secure all connected devices without individual VPN installations.
What I Liked
- Blazing Fast WiFi 7: Even without many true WiFi 7 devices, the 6GHz performance was exceptional, and it is ready for future tech.
- Massive, Consistent Coverage: My 3-pack easily blanketed my 4,500 sq. ft. home and outdoor areas, eliminating dead zones.
- Multi-Gig Ports: The four 2.5G ports on each unit are a significant advantage for modern wired devices and future-proofing.
- Effortless Setup and Management: The Deco app simplifies installation and daily network control.
- Strong Security Features: HomeShield and VPN support add valuable layers of protection and flexibility.
What Could Be Improved
- WPA2 Compatibility: As one user pointed out, some very old devices (like an older iPad they mentioned) might struggle with WPA3 if not properly configured or if they lack the option to fall back to WPA2 only. I had a similar experience with an older smart plug, which required setting up a specific WPA2-only guest network.
- Limited WiFi 7 Devices: While the system is top-tier, the full benefits of WiFi 7 are still nascent as compatible client devices are not yet widespread.
Who It Is For
This TP-Link Deco BE63 WiFi 7 Mesh System is ideal for users with large homes (up to 7,600 sq. ft.), a high number of connected devices, or those looking to future-proof their network for years to come. If you are into 4K/8K streaming, competitive online gaming, or frequently transfer large files, the BE63 delivers the speed and stability you need.
Alternatives
If WiFi 7 is not a critical requirement for you right now, or if your budget is tighter, TP-Link’s Deco XE75 or XE75 Pro (WiFi 6E) systems are excellent alternatives. I have tested the XE75 previously and found it offered great coverage and performance for most homes, especially on Prime Day deals, as a customer mentioned. However, if you want the absolute latest in performance and wired connectivity, the BE63 is the way to go.
In my testing, the TP-Link Deco BE63 (3-pack) stands out as a powerful, easy-to-manage solution for demanding home networks. It delivers on its promises of speed and coverage, setting a high bar for the next generation of mesh WiFi.
Advanced Placement Strategies for Maximum Coverage
Optimizing node placement transforms a good mesh network into a great one. The principles go beyond basic distance recommendations to consider your home’s unique characteristics.
Multi-Story Home Considerations
In multi-story homes, think three-dimensionally about coverage. WiFi signals travel better horizontally than vertically, especially through floors. Place nodes in vertical alignment when possible – a node directly above or below another provides better coverage than diagonal placement.
For two-story homes, position the main node centrally on the first floor and a satellite node directly above on the second floor. This creates a strong vertical backbone for your network. Additional nodes can extend coverage horizontally on each floor as needed.
Three-story homes or those with basements require special attention. Basements often need dedicated nodes due to concrete foundations blocking signals. Place the basement node near the ceiling for best upward connectivity. Consider running ethernet backhaul to basement nodes when possible for optimal performance.
Dealing with Building Materials and Obstacles
Different building materials affect WiFi signals differently. Drywall and wood cause minimal interference, while concrete and brick can reduce signal strength by 50% or more. Metal is essentially impenetrable to WiFi signals, so avoid placing nodes near metal doors, filing cabinets, or reinforced walls.
Kitchen appliances create particular challenges. Refrigerators, dishwashers, and microwaves all interfere with WiFi signals. Position nodes away from kitchens when possible, or place them strategically to provide coverage from multiple angles, ensuring at least one clear signal path to every area.
Large mirrors and windows with metallic tinting reflect WiFi signals, creating unexpected dead zones. Treat these surfaces like walls when planning placement. Fish tanks and water features absorb WiFi signals surprisingly well – a large aquarium can block signals as effectively as a concrete wall.
Outdoor Coverage Extension
Extending mesh coverage outdoors requires weatherproof nodes or strategic indoor placement. Position indoor nodes near windows facing your outdoor spaces for basic coverage. For reliable outdoor coverage, invest in weather-resistant nodes designed for exterior mounting.
Consider your outdoor usage patterns. Pool areas, patios, and outdoor kitchens need strong coverage for entertainment and security cameras. Garages and workshops benefit from dedicated nodes, especially if you have smart garage door openers or use connected tools.
EasyMesh and Cross-Brand Compatibility
One of the most common questions I encounter is whether you can mix different brands of mesh systems. The short answer is typically no, unless both systems support the WiFi Alliance’s EasyMesh standard. Understanding EasyMesh helps you make informed decisions about expanding or upgrading your network.
EasyMesh is a certification program that enables mesh devices from different manufacturers to work together seamlessly. When both your router and extender carry the EasyMesh certification, they can form a unified mesh network regardless of brand. This means you could theoretically pair a TP-Link EasyMesh router with an ASUS EasyMesh node, or add a Netgear EasyMesh satellite to an existing EasyMesh system.
However, EasyMesh adoption is not universal. Many manufacturers still use proprietary mesh protocols that only work within their own ecosystems. TP-Link’s Deco series, for example, uses its own protocol and will not mesh with non-TP-Link devices. Similarly, Netgear Orbi systems only work with other Orbi devices. Before assuming EasyMesh compatibility, check the specific model numbers and certifications.
The practical benefit of EasyMesh comes when you want to expand coverage using equipment you already own or find a great deal on a different brand. Instead of being locked into one manufacturer’s ecosystem, you can add nodes as needed. Just remember that features like unified management apps and advanced security may not work across brands, even with EasyMesh.
MoCA and Coax Backhaul Alternatives
Not every home has ethernet wiring between floors, but many have coaxial cable (coax) running through walls from previous cable TV installations. Multimedia over Coax Alliance (MoCA) technology lets you use these existing coax lines for networking, providing an excellent backhaul alternative to running new ethernet cables.
MoCA adapters convert ethernet signals to travel over coaxial cable, then convert them back to ethernet at the other end. This effectively turns your home’s coax wiring into a high-speed ethernet network. MoCA 2.5, the current standard, supports speeds up to 2.5 Gbps – more than enough for even the fastest home internet connections.
Setting up MoCA backhaul requires adapters at each end of the coax run. You connect your mesh node’s ethernet port to a MoCA adapter, which plugs into a coax outlet. At the other location, another MoCA adapter connects the coax to your satellite node’s ethernet port. Some mesh systems, particularly from Motorola and Actiontec, include built-in MoCA support.
Coax backhaul offers several advantages over wireless backhaul. It is not affected by interference from neighboring WiFi networks, provides consistent speeds regardless of distance or walls, and frees up your WiFi radios to serve devices rather than communicate between nodes. For homes with coax already installed, it is often the most practical high-performance backhaul solution.
Before investing in MoCA adapters, verify your coax wiring is suitable. Cable TV and satellite systems often share coax lines, and you may need to isolate the runs you want to use for networking. Also check that your splitters and amplifiers support the frequencies MoCA uses. Most modern equipment does, but older hardware might need upgrading.
Network Security Configuration
Security often gets overlooked during mesh setup, but protecting your network is crucial in 2026‘s connected world. Modern mesh systems include robust security features that need proper configuration.
Essential Security Settings
Start with WPA3 encryption if your system supports it. WPA3 provides stronger protection than WPA2, especially for open networks. If some older devices will not connect with WPA3, use WPA2/WPA3 mixed mode temporarily while you update or replace incompatible devices.
Change default administrative credentials immediately. Your mesh system’s management interface needs a strong, unique password different from your WiFi password. Enable two-factor authentication if available – this prevents unauthorized access even if someone discovers your admin password.
Disable WPS (WiFi Protected Setup) unless actively using it. While convenient, WPS has known vulnerabilities that compromise network security. Similarly, disable remote management unless you specifically need to access your network settings from outside your home.
Network Segmentation and Guest Access
Create a guest network for visitors and less-trusted devices. Guest networks isolate connected devices from your main network, preventing access to personal files and devices. Set guest networks to automatically disconnect devices after 24 hours to maintain security.
Consider creating a separate IoT network for smart home devices. Many IoT devices have poor security implementations and receive infrequent updates. Isolating them protects your main network if a device gets compromised. Some mesh systems offer automatic device type detection and segmentation.
Monitoring and Access Control
Enable access control notifications to know when new devices join your network. Review connected devices weekly and remove any you do not recognize. Most mesh apps show device names, MAC addresses, and connection history for easy identification.
Set up parental controls thoughtfully. Beyond content filtering, use time-based restrictions to manage screen time. Create profiles for each family member with appropriate permissions. Remember that determined teenagers often find workarounds, so combine technical controls with open communication.
Troubleshooting Common Mesh WiFi Issues
Even well-planned mesh networks encounter issues. Understanding common problems and their solutions saves frustration and support calls.
Connection and Sync Problems
When nodes will not sync, start with placement. Nodes too far apart cannot establish reliable connections. Temporarily move the problematic node closer to the main unit for initial sync, then gradually move it to the desired location.
Factory reset stubborn nodes that refuse to connect. Hold the reset button for 10-15 seconds until lights flash. Delete the node from your app, then re-add it as new. This clears corrupted configurations that prevent proper synchronization.
Check for interference from neighboring networks. Use your app’s diagnostic tools or a WiFi analyzer to identify crowded channels. Many mesh systems automatically select optimal channels, but manual selection sometimes resolves persistent issues.
Speed and Performance Issues
Slow speeds despite strong signals often indicate backhaul problems. Verify nodes connect to each other optimally – some nodes might daisy-chain unnecessarily instead of connecting directly to the main unit. Reposition nodes to establish direct connections when possible.
Implement ethernet backhaul for demanding applications. Running ethernet cables between nodes eliminates wireless backhaul limitations, providing full speeds to every node. This dramatically improves performance for 4K streaming, gaming, and large file transfers.
Update firmware regularly. Manufacturers frequently release updates improving performance and fixing bugs. Enable automatic updates or check monthly for new versions. Apply updates during low-usage periods as the network briefly disconnects during installation.
Device-Specific Problems
Older devices sometimes struggle with modern mesh networks. They might not support band steering or get confused by multiple nodes broadcasting the same network name. Create a 2.4GHz-only network for these devices or temporarily disable 5GHz to force connection.
Smart home devices particularly suffer from connection issues. Many only support 2.4GHz and have trouble with advanced security features. During setup, temporarily disable 5GHz and use WPA2 security. Once connected, re-enable your preferred settings – devices typically maintain their connections.
Gaming consoles benefit from port forwarding or DMZ settings for optimal online play. Configure these settings in your mesh app, assigning static IP addresses to consoles for consistent connectivity. Enable UPnP for automatic port management if your system supports it securely.
WiFi 6E and WiFi 7: Future-Proofing Your Mesh Network
The rapid evolution of WiFi standards makes future-proofing important when investing in mesh systems. WiFi 6E added 6GHz bands, while WiFi 7 promises revolutionary improvements in speed and reliability.
Understanding WiFi 6E Benefits
WiFi 6E mesh systems utilize the 6GHz band exclusively for backhaul communication, leaving 2.4GHz and 5GHz bands entirely for your devices. This dedicated backhaul eliminates the bandwidth sharing that plagued earlier mesh systems.
The 6GHz band offers seven 160MHz channels compared to just two in the 5GHz band. This additional spectrum reduces interference and enables true gigabit speeds throughout your mesh network. However, 6GHz signals do not penetrate walls as well as lower frequencies, requiring careful node placement.
WiFi 7 and Multi-Link Operation
WiFi 7 introduces Multi-Link Operation (MLO), allowing devices to simultaneously connect across multiple bands. Your laptop could use 5GHz and 6GHz simultaneously, doubling throughput and reducing latency. For mesh networks, MLO means unprecedented reliability and performance.
320MHz channels in WiFi 7 double the maximum channel width of WiFi 6E, potentially delivering 40Gbps aggregate throughput. While consumer internet connections will not reach these speeds soon, the extra capacity eliminates network congestion even with hundreds of connected devices.
When to Upgrade Your Mesh System?
Consider upgrading to WiFi 6E or 7 if you have gigabit or faster internet, use many high-bandwidth devices simultaneously, or live in dense urban areas with significant WiFi congestion. The investment makes sense for future-proofing, as devices supporting these standards become mainstream.
However, WiFi 5 or 6 mesh systems remain perfectly adequate for most homes in 2026. If your internet speed is below 500Mbps and you are not experiencing congestion issues, current-generation systems provide excellent value. Focus on proper setup and placement rather than chasing the latest standards.
Optimizing Mesh WiFi for Specific Use Cases
Different households have unique networking needs. Customizing your mesh configuration for specific use cases maximizes performance where it matters most.
Work-From-Home Optimization
Remote work demands consistent, reliable connectivity for video conferences and cloud applications. Position a mesh node in or near your home office for strongest possible signal. Use ethernet connection from the node to your work computer when possible for ultimate stability.
Configure QoS to prioritize work devices during business hours. Most mesh systems allow scheduling, automatically giving your work computer priority from 9-5 while normal priorities resume evenings and weekends. Create a separate network segment for work devices if handling sensitive data.
Test your setup with typical work applications before important meetings. Run video calls from your workspace while family members stream video elsewhere. Verify you maintain quality during peak usage. Consider upgrading your internet plan if video calls suffer when others use the network.
Gaming and Streaming Optimization
Gaming requires low latency more than raw bandwidth. Position nodes to provide direct paths between gaming devices and the main node. Avoid daisy-chained connections that add latency. Use ethernet connections for gaming PCs and consoles whenever feasible.
Enable gaming mode or similar features that prioritize gaming traffic. Configure port forwarding for specific games requiring it. Some mesh systems offer automated gaming optimization that detects and prioritizes gaming traffic without manual configuration.
For streaming, ensure adequate bandwidth to multiple devices simultaneously. 4K streaming requires 25Mbps per stream, so multiple TVs need substantial total bandwidth. Position nodes near streaming devices and use 5GHz or 6GHz bands for best performance.
Smart Home Integration
Smart home devices present unique challenges despite needing minimal bandwidth. They often use older WiFi standards and struggle with advanced features. Create a dedicated 2.4GHz network for IoT devices if experiencing connection issues.
Plan node placement considering smart device locations. Security cameras, video doorbells, and outdoor sensors need reliable connectivity. A node near your front door improves doorbell camera performance, while garage nodes support smart openers and security systems.
Implement network segmentation for security. IoT devices frequently have security vulnerabilities, so isolating them from computers and personal devices adds protection. Configure firewall rules preventing IoT devices from communicating with each other unnecessarily.
Maintenance and Performance Monitoring
Maintaining your mesh network ensures continued optimal performance. Regular monitoring catches issues before they become problems.
Regular Maintenance Tasks
Check for firmware updates monthly. Manufacturers regularly release updates improving performance, adding features, and patching security vulnerabilities. Schedule updates during low-usage periods as your network briefly disconnects during installation.
Review connected devices quarterly, removing any you do not recognize or no longer use. Unknown devices might indicate unauthorized access, while old devices consume IP addresses and management resources unnecessarily.
Physically inspect nodes every few months. Dust accumulation reduces cooling efficiency, potentially causing thermal throttling. Clean vents with compressed air and ensure adequate ventilation around each node.
Performance Monitoring Tools
Use your mesh system’s built-in analytics to track network health. Monitor metrics like daily usage, peak usage times, and per-device consumption. This data helps identify bandwidth hogs and plan upgrades.
Third-party tools provide additional insights. Apps like WiFi Analyzer show channel congestion and signal strength throughout your home. Speed test apps help verify you are getting expected performance in all areas.
Document your network configuration including node locations, settings changes, and connected devices. This reference proves invaluable when troubleshooting or expanding your network. Include photos of node placement for easy recreation if needed.
When to Expand or Upgrade?
Add nodes when coverage gaps persist despite optimization or when adding new living spaces. Most mesh systems support adding nodes years after initial purchase, though matching models ensure compatibility.
Consider upgrading your entire system when your internet speed significantly exceeds your mesh system’s capabilities, device counts overwhelm current capacity, or newer standards offer meaningful improvements for your use case.
Cost Considerations and ROI
Understanding the economics of mesh WiFi helps justify the investment and choose appropriate systems for your needs.
Initial Investment vs Long-term Value
Mesh systems cost more than traditional routers but provide superior coverage and reliability. Entry-level systems start around $150 for two nodes, while premium WiFi 6E/7 systems can exceed $1000. Consider your home size, device count, and performance needs when budgeting.
Calculate the true cost of poor WiFi coverage. Lost productivity from dropped video calls, frustration from buffering streams, and the time spent troubleshooting connection issues add up. A reliable mesh network eliminates these hidden costs.
Factor in longevity when evaluating cost. Quality mesh systems last 5-7 years with regular firmware updates extending useful life. Compared to replacing cheap routers every 2-3 years, mesh systems often prove more economical long-term.
Avoiding Overbuying
Resist the temptation to buy the most nodes possible. Start with the recommended number for your square footage, adding nodes only if needed. Excess nodes create unnecessary wireless congestion without improving coverage.
Match system capabilities to your internet speed. WiFi 6E/7 systems will not improve your experience if you have 100Mbps internet. Invest in appropriately specified systems and upgrade when your internet speed justifies it.
Consider refurbished or previous-generation systems for budget-conscious deployments. WiFi 5 mesh systems remain perfectly capable for most households and offer exceptional value as newer standards launch.
Frequently Asked Questions
How many mesh nodes do I need for my home?
The number of nodes depends on your home’s size, layout, and construction. For general guidance: 1,500 square feet or less needs 2 nodes, 1,500-3,000 square feet typically requires 3 nodes, and larger homes need 4 or more. Challenging layouts with multiple floors or dense construction materials may need additional nodes regardless of square footage.
Can I mix different brands of mesh WiFi systems?
Generally no, unless both systems support the EasyMesh standard. Most manufacturers use proprietary protocols that only work within their own ecosystems. TP-Link Deco works only with other Deco units, Netgear Orbi only with Orbi, etc. However, any WiFi device can connect to any brand’s mesh network as a client. EasyMesh-certified devices from different brands can work together, but this feature is not universally supported.
Should I use ethernet backhaul if possible?
Yes, ethernet backhaul dramatically improves mesh performance by eliminating wireless backhaul overhead. If you can run ethernet cables between nodes, even just to some nodes, you will see significant speed improvements. This is especially beneficial for nodes serving high-bandwidth devices like gaming consoles or 4K streaming devices. MoCA over coax is an excellent alternative if ethernet wiring is not available.
How far apart should mesh nodes be placed?
Optimal distance varies based on your environment, but aim for 30-50 feet in open spaces and 20-30 feet when dealing with walls. Nodes need strong connections to each other while providing coverage to devices. Too close wastes coverage area and creates interference; too far causes weak inter-node connections and poor performance. Use your mesh app’s signal strength tool to verify optimal placement.
Do mesh WiFi systems work with any internet provider?
Yes, mesh systems work with any internet provider and connection type (cable, fiber, DSL, satellite). You will need a modem from your ISP or a compatible third-party modem. If you have a modem-router combo from your ISP, set it to bridge mode to avoid conflicts with your mesh system. Some ISPs like AT&T and T-Mobile offer their own mesh solutions that integrate seamlessly with their service.
Will mesh WiFi increase my internet speed?
Mesh WiFi does not increase the internet speed from your ISP but ensures you get consistent speeds throughout your home. If you pay for 300Mbps but only get 50Mbps in your bedroom due to poor router coverage, mesh WiFi can deliver closer to that full 300Mbps by eliminating dead zones and weak signals. Your internet speed is limited by your ISP plan, not your WiFi equipment.
Can I keep my existing router with a mesh system?
It is not recommended to run both simultaneously as they will interfere with each other. Either replace your router entirely with the mesh system or set your existing router to bridge/modem mode if it is a combo unit. Running multiple WiFi networks in the same space creates interference and degrades performance. If your ISP provided a gateway, disable its WiFi or put it in bridge mode.
How often should I restart my mesh network?
Modern mesh systems rarely need manual restarts. Unlike older routers that benefited from weekly reboots, mesh systems manage resources efficiently. Only restart if experiencing specific issues or after firmware updates. Some systems offer scheduled automatic restarts if you prefer regular refreshes. Frequent restarts may indicate a configuration problem that needs addressing.
What is the difference between mesh WiFi and range extenders?
Mesh systems create one unified network with seamless roaming, while range extenders create separate networks that devices must manually switch between. Mesh maintains consistent speeds across nodes, while extenders typically cut bandwidth in half because they must receive and retransmit on the same channel. Mesh systems also offer centralized management, automatic updates, and better security features. Extenders are cheaper but provide a poorer user experience.
Is WiFi 6E or WiFi 7 worth the extra cost for mesh systems?
For most households in 2026, WiFi 6 mesh systems offer the best value. WiFi 6E/7 benefits users with gigabit or faster internet, many simultaneous high-bandwidth devices, or those in congested urban areas. If your internet is below 500Mbps and you are not experiencing congestion issues, save money with WiFi 6 or even WiFi 5 systems. WiFi 7 is primarily for future-proofing as compatible devices are still emerging.
What is EasyMesh and should I look for it?
EasyMesh is a WiFi Alliance certification that allows mesh devices from different manufacturers to work together. If both your router and extender are EasyMesh certified, they can form a unified mesh network regardless of brand. However, many manufacturers still use proprietary protocols. EasyMesh is worth considering if you want flexibility to mix brands, but check specific model compatibility as support varies widely.
Can I use MoCA instead of ethernet for backhaul?
Yes, MoCA (Multimedia over Coax Alliance) is an excellent alternative to ethernet backhaul. It uses your home’s existing coaxial cable wiring to create a high-speed network between nodes. MoCA 2.5 supports speeds up to 2.5 Gbps, which is more than sufficient for even the fastest home internet. You will need MoCA adapters at each end of the coax run, but this is often easier than running new ethernet cables through walls.
Final Thoughts and Best Practices
Setting up mesh WiFi transforms your home network from a source of frustration into invisible, reliable infrastructure. The key lies in thoughtful planning, proper placement, and understanding your specific needs rather than chasing specifications.
Start with the basics: position nodes strategically, use ethernet backhaul when possible, and keep firmware updated. These fundamentals matter more than having the latest WiFi standard or the most expensive system. A well-configured WiFi 5 mesh network outperforms a poorly set up WiFi 6E system every time.
Remember that mesh networks are living systems requiring occasional attention. Monitor performance, adjust settings as your needs change, and do not hesitate to relocate nodes if usage patterns shift. The flexibility to adapt your network over time is one of mesh WiFi’s greatest advantages.
Take security seriously from day one. Use strong passwords, enable WPA3 when possible, and segment your network appropriately. The convenience of whole-home coverage should not come at the expense of network security.
As you implement these setup strategies, you will discover that mesh WiFi is more than just expanded coverage – it is about creating a network that adapts to how you actually live and work in your space. Whether you are streaming in the basement, working in the attic office, or relaxing in the backyard, properly configured mesh WiFi delivers consistent, reliable connectivity everywhere you need it.
How to set up mesh WiFi does not have to be complicated. With the right preparation, equipment, and knowledge from this guide, you can build a network that serves your entire home without the headaches of traditional router setups. The investment in time and equipment pays dividends through years of reliable, whole-home connectivity.
![Best SD Cards [cy]: Top-Rated Memory Cards Tested](https://www.guidespot.com/wp-content/uploads/2026/07/featured-1783552957341-370x245.jpg "15 Best SD Cards (2026): Top-Rated Memory Cards Tested")
![How to Clean a Laptop Screen Without Damaging It in [cy]](https://www.guidespot.com/wp-content/uploads/2026/07/featured-update-44590-1783188935088-370x245.jpg "How to Clean a Laptop Screen (2026): The Ultimate Safe Display Guide")

